Friday, May 15, 2015

THE PERFECT SWOOP BANGS

THE PERFECT SWOOP BANGS
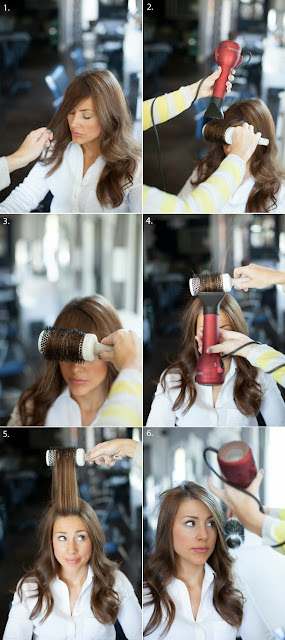
If the new year has you itching to update your look but you’re hesitant to do something drastic, then changing up your part might be just what the doctor ordered! The side “swoop” bang is super low maintenance and can give your look a little update that’s a much lower commitment than chopping true bangs. While it’s easy to do yourself, there are a few tricks you’ll need to master if you want to get that perfectly voluminous swoop that we see in magazines. Here’s how to do it…

  1. Part your hair far to the side (past the arch of your brow) so that it will swoop across. Dry all your hair, leaving the bangs for last. Then re-wet the bangs with a little water or spray bottle.
  2. With a large round brush placed underneath the bangs, pull hair straight down in front of you and blow dry on top. Don’t worry about pulling bangs to the side yet.
  3. Once bangs are mostly dry, place the brush in front of bangs and start rolling it back while pulling in a forward motion, as pictured. Blow dry as you roll.
  4. Roll bangs until they’re sitting right at the front hairline. Allow hair to cool by holding brush in place or using a cool blast from the blow dryer — this will set the curl and give the most volume.
  5. Once bangs have set, pull the brush up and let bangs fall to the side. The volume and curl you have created should allow the hair to naturally “swoop”.
  6. Spray the hair underneath the bangs to help them stay to the side or to fight any tricky cowlicks.

Blogger : Catherine Bell
Photo : source

HALF-UP FISHTAIL

HALF-UP FISHTAIL
Anyone else still obsessed with fishtail braids?  Martha Lynn here, and there’s nothing I love more than a style that can accomplish two things at once, and a “half-up” look manages to give you the best of both worlds — the romantic feel of your hair down, partnered with the polished look of an updo. This simple technique takes your average “half-up” style and turns it up a notch by pairing it with a couple of fishtail braids… the end result is gorgeous, whimsical and super versatile.

  1. Start with hair in your natural part. Divide hair in front of the ear into two sections as pictured.
  2. Start fishtailing the hair. If you still haven’t mastered the fish tail technique check out Claire’s tutorial .
  3. Once the first fishtail is complete, secure with clip.
  4. Braid second fishtail on other side of part and gather both braids at the ends.
  5. Secure with a clear rubber band. Wiggle the rubber band down a tiny bit to loosen the braids.
  6. Carefully tug on braids to loosen them up — the more you pull them apart, the larger they will be. Use a comb or fingers to pull hair at crown to add volume.
  7. Curl remaining hair at the bottom. When curling, alternate directions so curls stay separated
  8. Set with hairspray.

Blogger : Catherine bell
Photo : source

Thursday, May 14, 2015

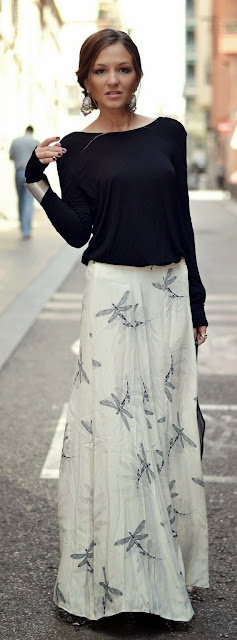
Lullaby Print Maxi Skirt and Black Long Sleeve Top - Street Styles

Lullaby Print Maxi Skirt and Black Long Sleeve Top - Street Styles
Blogger : Catherine bell
Photo : source

Powder Blue , White and Nude Street style - Mariannan

Powder Blue , White and Nude Street style - Mariannan
Blogger : Catherine Bell
Photo : source

Light Grey Turtleneck Sweater and Skinny Ripped Jeans - Brooklyn Blonde

Light Grey Turtleneck Sweater and Skinny Ripped Jeans - Brooklyn Blonde
Blogger : Catherine Bell
Photo : source

Neutrals Chic Street Style

Neutrals Chic Street Style
Blogger : Catherine bell
Photo : source

Floral Romper and Chic Shoes - Darling Detail

Floral Romper and Chic Shoes - Darling Detail
Blogger : Catherine Bell
Photo : source

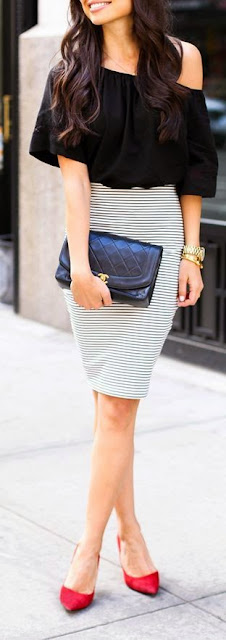
Striped Pencil Skirt , Black Top and Red Pumps - With Love From Kat

Striped Pencil Skirt , Black Top and Red Pumps - With Love From Kat
Blogger : Catherine bell
Photo : source

Pinch Of Gold On Black Outfits - Micah Gianneli

Pinch Of Gold On Black Outfits - Micah Gianneli
Blogger : Caherine bell
Photo : source

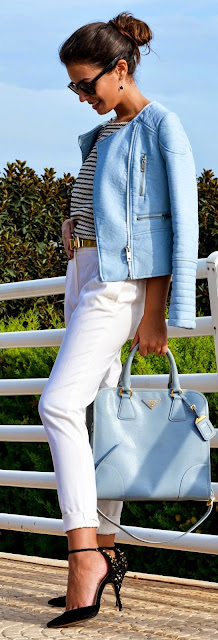
Light Blue Leather and Sexy Black Heels - Chic Outfits

Light Blue Leather and Sexy Black Heels - Chic Outfits
Blogger : Catherine Bell
Photo : source

Yellow Skater Dress - Chic Street Style

Yellow Skater Dress - Chic Street Style
Blogger : Catherine bell
Photo : source

Sexy Balmain Denim Dress - Johanna Olsson

Sexy Balmain Denim Dress - Johanna Olsson
Blogger : Catherine bell
Photo : source

Wednesday, May 13, 2015

Gold Top and Burgundy High Waist Pant , Lovely Outfits

Gold Top and Burgundy High Waist Pant , Lovely Outfits
Blogger : Catherine bell
Image : source

Specials Nails Art Tutorials Easter Bunny

Specials Nails Art Tutorials Easter Bunny
Step by Step : 

1. To start enamelling nails with these tones: Matinee (Impala), Bonequinha Charming (Risqué), Cigarrete (Risqué), Black (L'Apogée) and Montana (L'Apogée).

2. Then, I added white polka dots using a small boleador and white acrylic paint.

3. In the ring, I began to draw the bunny with small brush for nail art and white acrylic paint.

4. Added the little ears, making them more chubby tips that basis as well:

5. With enamel Montana , drew the inside of the little ears:

6. With black acrylic paint, drew the little eyes and nose.

7. I finished all with top coat and go!

Blogger : Catherine Bell
Image : source

Super Famous Black Smokey Eye Makeup Tutorials

Super Famous Black Smokey Eye Makeup Tutorials
Step by Step :

1. Start applying the make beige pencil below the brow and inner corner. I spread the sequence with the index finger.

2. Now every eye contour with black pencil, without exceeding the dobrinha eye. It is important that the pencil has a slightly creamy texture, so it does not "stain" the lid and let the black uniform.

3. With a pontudinho soft contour brush all black with brown shadow opaque chocolate.

4. With a fluffy brush caught the same brown shadow and esfumó it on the concave and outer corner. But not too out, follow the rounded design of my eye, and you should follow the design of yours, okay?

5. With the same brush cuddly caught opaque and esfumó black shadow below her brown concave and outer corner.

6. Now with a dense and firm brush deposit opaque black shade on the mobile eyelid, leaving the very strong tone to dobrinha eye. Apply one three layers of black to stay ultra strong! It is important to press the brush against the eyelid, so the shadow adheres better. Rubbing or think, okay?

7. With a low cut brush to apply the black shadow close to the lower lashes, and upon leaving the brown pencil shading out.

8. I conclude with beige shade illuminating the internal corner. This step is optional, as my eye is small I like to turn up, but if you have olhão can jump!

Used Products :

Begete pencil
Beloved Touch of Nature
Brush the ES12 Pink Gloss
Trio Pause shadows to Feminices
Brush the ES07 Pink Gloss
Palette of shadows
Brush E5 of The Beauty Box
Sigma E20 brush.

Blogger : Catherine Bell
Image : source

How to : Easier Gorgeous Nails Tutorials

How to : Easier Gorgeous Nails Tutorials
Step by Step :

1.  Cut five paper hole stickers in two.

2. Apply the base .

3. Aply the first nailpolish, then let it dry.

4. When dry, apply stickers on each nails.

5. Apply the second nailpolish.

6. A few drying drops, so it would dry just in a few seconds.

7. When dry, take the stickers off.

8. Apply top coat.

9. Done !

                                                          Have Fun Guys Thanks you !!!!!

Blogger : Catherine Bell
Image : source

Christian Louboutin Inspired Nails

Christian Louboutin Inspired Nails
The steps are dead easy and no special skills are required! Just a steady and patient pair of hands will do!

Blogger : Catherine Bell
Image : source

How to : Apply False Eyelashes

How to : Apply False Eyelashes
Step by Step :


Have you ever spent hours in front of the mirror trying to apply fake eyelashes, only to end up with them sticking out at strange angles, or—worse—fall off completely after a few hours? Because falsies are tricky to master, we tapped Los Angeles–based makeup artist Gia Brascia to show us her tried-and-true application (and removal) tips.
For the tutorial, we used Kevyn Aucoin The Lash Collection in Starlett. 
1: Before you do anything else, measure the length of the lash to make sure it fits your eye shape. If the strip needs to be cut to fit, snip the outer edge completely off with small nail scissors. This will avoid drooping at the corner (meaning: no more lashes poking your eyeball). 
2: Take both edges of the lash and bend inward to create a “C” shape, and hold for a couple of seconds. That’s the best way to take out the straightness and ensure it molds to our curved eye shape and stays put without the corners lifting up. Just this alone will make the rest of the process effortless.
3: Apply a high-quality glue such as DUO Eyelash Adhesive for lasting results (Brascia suggests avoiding the glue that comes with your lashes). If you have a steady hand, you can squeeze straight from the tube onto the strip. Tend to get shaky? An easy trick: put glue on the reverse (handle) end of a tweezer and glide it across the strip, as pictured. Be generous at both the inner and outer corners so the glue won’t unstick when you blink.
4: Wait ten seconds or so for the glue to become more tactile and sticky (you can also blow on the glue or wave it gently in the air) before placing the lash. This is the best way to keep the strip from slipping around while you’re trying to line it up properly. 
5: Aim for the base of your natural lash line, right on top of your real lashes, not touching the eyelid at all. The glue dries clear, so don’t worry if a little gets on your skin.
6: Once you’ve placed both lashes, you can do your mascara; this will help integrate the natural lashes with the false ones.
7: If you see a gap showing on the eyelid between your real lashes and falsies, don’t worry! You don’t have to pull it off and start again, says Brascia. Just fill in the gap, using a matte black eye shadow as a liner to hide it (we used Inglot Cosmetics Freedom System Eyeshadow in 391). This step will also help the glue dry more quickly
Removal Tips: Always remove false lashes before taking off rest of your eye makeup. First pre-soften the glue with a cotton swab that’s been soaked in an oily makeup remover, like rms beauty Raw Coconut Cream. Dab the swab along the lash line to loosen the glue and break down its stickiness. With your eye open, take hold of the lash at tip of the outer corner. Then close your eyes and very slowly peel the strip away from your real lash, working from outer to inner corner—toward the nose. 

Blogger : Catherine Bell
Image : source

Redheads | How to do : Your Brows and Mascara

Redheads | How to do : Your Brows and Mascara
Step by Step :

When it comes to a redhead’s makeup routine, one of the biggest challenges is finding the right color for emphasizing eyebrows and eyelashes. This can be tricky, since most natural redheads have either very light copper brows and lashes or barely-there blondish-white ones. That coloring poses a problem with too-dark mascara—if it isn’t applied all the way to the lash line it’s really noticeable. Same goes for eyebrow products that are too dark.


Natural Brows for Redheads

You Will Need


• Tinted brow gel. Match the color of the gel to your hair for the most natural-looking result; we used Anastasia Tinted Brow Gel in Brunette.
• Two extra brow brushes

Steps

1: Take the brush from your brow gel and wipe excess gel onto the lip of the tube (similar to how you would with mascara).
2: Start at the inner corner of your eye and brush outward, in the same direction the hair grows.
3: As you apply, use the tip of the brush wand to help re-style the shape of the brows.
4: To finish the look, use one of the clean extra brow brushes and go over the brow hairs to separate and break up. 
5: Repeat on your other brow, using the second clean brush.

Redhead Lashes Made Easy

You Will Need

• Brown mascara; we used Inglot Cosmetics Color Play Mascara in Brown
• Eyelash curler like Billy B. Beauty Eyelash Curler
• Fan brush; we used the small one from Inglot Cosmetics Brush Set 14

Steps

1: Curl lashes. Look down, press curler onto lashes, hold it, remove, and repeat, moving down your lashes until they’re curled to your liking.
2: Take the mascara wand and apply product to lashes, rocking back and forth horizontally as you swipe up and out.
3: Use the fan brush to get in between the lash line. Rather than dipping the brush into the mascara bottle, wipe a bit of the product onto the brush using the mascara wand. Look down, and apply mascara to the base of the lashes with an outward motion.
4: If you want to intensify the look for night, just use a bit more product and do an extra coat or two. 

Blogger : Catherine Bell
Image : source

Omg Pop Classic Red Little Dress ♥ Love this Outfits

Omg Pop Classic Red Little Dress ♥ Love this Outfits
Blogger : Catherine Bell
Image : source

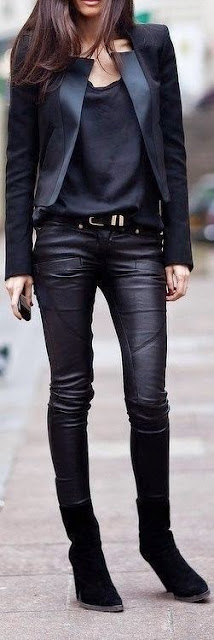
Everything Perfect Black Outfits , Specially New Leather Biker Pant.

Everything Perfect Black Outfits , Specially New Leather Biker Pant.
Blogger : Catherine Bell
Image : source

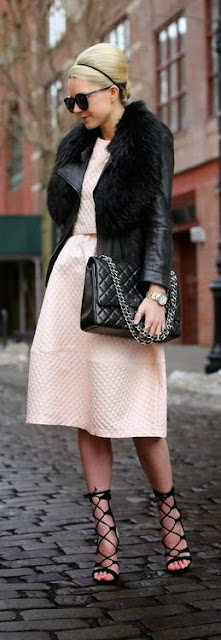
Baby Pink Dress with Black Puff and Lace Shoes

Baby Pink Dress with Black Puff and Lace Shoes
Blogger : Catherine Bell
Image : source

Tuesday, May 12, 2015

How to : Curls Your Hair

How to : Curls Your Hair
I know what you’re all thinking: “That’s some fabulous, wavy hair… but mine could never look that good.” Ladies, I kid you not — I sat through this exact curling tutorial with Martha Lynn several months ago, and since then I’ve been curling and twirling with the best of ‘em. All I needed was someone to show me how to properly use a curling iron, and after that practice made perfect! Feeling like you’re ready to give it a shot this weekend? We’ve broken it down for you step-by-step after the jump


  1. Section hair into a vertical section in front of the ear.
  2. Spray section with hair spray. Holding the curling iron clamp with your index finger (we prefer a 1.25-inch Hot Tools curling iron), clamp the section mid-shaft.
  3. Reach your opposite hand over to grab the rubber top of your iron, and immediately curl upward.
  4. Slightly loosen clamp grip on hair, and inch the curling iron downward. Then burl upward again. Repeat down the length of your hair section.
  5. Loosen clamp grip and release. Spray.
  6. Repeat steps 1 to 5 going around the head.
  7. Run fingers through your hair to break up the curls.
  8. Section hair into small sections around the crown.
  9. Wrap hair around the barrel of the curling iron (with clamp down). Repeat around the entire crown. Spray hair all over.

Blogger : Catherine Bell
Photo : source

Grey Faux Tulle Skirt , Off shoulder Cute Sweater and High Heel Booties

Grey Faux Tulle Skirt , Off shoulder Cute Sweater and High Heel Booties
Blogger : Lolobu
Image : source

Black Short Dress with Animal Print Shoes

Black Short Dress with Animal Print Shoes
Blogger : Catherine Bell
Image : source

Floral Pattern Hippie Lined Maxi Dress with Blue Pumps

Floral Pattern Hippie Lined Maxi Dress with Blue Pumps
Blogger : Caherine BellImage : source

Easy and Simple Braided Crown

Easy and Simple Braided Crown
I shared a Rolled Chignon tutorial that’s great for medium-length hair… well, today’s ‘do goes out to all my Rapunzel’s out there! I’ve been spotting lots of braids out and about this summer, and with the triple-digit heat in Austin, I had to give the trend a try. Claire’s long hair is perfect for this Heidi-esque braided crown, and I love the way her dimensional color really pops in braids. Scroll down for the step-by-step, and give this look a try next time you need to keep cool in style!

  1. Split hair into two sections. I like to leave the hair in it’s natural part in front, and then part the hair down the middle in back to ensure the braids are the same thickness.
  1.  Smoothing fly aways as you go, braid the hair and finish with a clear rubber band.
  1. Grabbing a small piece of hair out of the “tail”.
  1. Hold the rubber band and carefully slide the hair onto itself to gently tousle the braid and give it more texture.
  1. Wrap the braid around the head and secure with bobby pins.
  1. Repeat on the other side, tucking in the ends of the braid under each other. Spray all over.

Blogger : Catherine BellPhoto : source

Pop look Green Lace Romper and Clutch

Pop look Green Lace Romper and Clutch
Blogger : Catherine Bell
Image : source

Knotted Side Braid

Knotted Side Braid
We don’t often think of knotting our hair when styling, but I’ve been using the technique to create simple-yet-intricate hairdos for years. I’m always on the hunt for hair styles that can be put together in a few easy steps, but when complete, make everyday hair look and feel a little more special. In this knotted side braid, I tied a few strategic knots into Claire’s gorgeous blond locks to achieve a style that’s interesting and also has some serious staying power… if you can tie your shoes, chances are you can recreate this look! Keep reading for the step-by-step (photographed by Kate Stafford), and don’t be afraid to experiment with knotting! I’m already dying to try a half-up version of this look, or braiding it straight down the back...

  1. Apply a smoothing serum (I love Living Proof Satin) to keep fly aways at bay. Gather hair on the side of your head and part into two even sections.
  1. Keeping the hair neat, tie the two sections into a knot as pictured.
  1. Grab the two tail ends of the knotted sections, and knot again as pictured.
  1. Knot a third time, and continue knotting if you have the length. Secure at the bottom with a clear rubber band. Once braid is tied off, carefully tug on the knots to loosen and create a more tousled look. Spray all over.

Blogger : Catherine BellPhoto : source

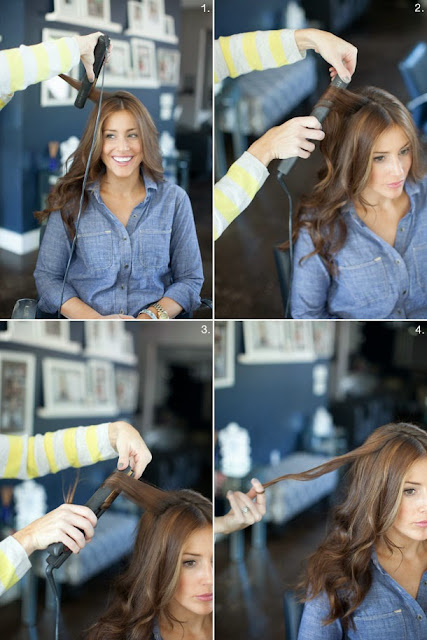
Chic Flat Iron Curls

Chic Flat Iron Curls
If you feel like you get tangled up when you pick up a curling iron, then this technique is a great option for you. Martha Lynn here, and I absolutely love how quickly you can curl a head of hair with this swift little trick. And (get ready for it) we use a flatiron to achieve the look! I know it seems counterintuitive, but we’re going to teach you how that favorite tool can do so much more than give you straight strands – it can actually create those perfectly imperfect curls that we all dream about and can’t stop pinning. Keep reading for the super easy step-by-step.

  1. Start with a flat iron that is slightly rounded around the plate — I am using a chi in this demo. Grab a small section of the hair and get ready to move quickly! With the flat iron pointed down, clamp it on the hair a few inches away from the root. This will give a more relaxed curl that doesn’t start too high up.
  1. Use your other hand hold the iron closed at the tip, and begin “rolling” it away from the face while the hair feeds itself through.
  1. Continue rolling and sliding the flat iron down until all of the hair has been curled.
  1. Repeat around your whole head, and spray if desired. The smaller the section of hair and the hotter the flat iron, the tighter the curls will be!

Blogger : Catherine BellPhoto : source